Contrary to popular to what you see in movies, shooting a handgun accurately is very difficult. It takes a lot of practice with solid fundamentals to comfortably group several rounds in your intended target.
Whether you are a competitive shooter, a weekend warrior, or carry a handgun for safety, knowing how to shoot pistols properly is imperative. Here are some of the fundamentals to build a solid base for shooting a pistol correctly and accurately.
Shooting Stance
The foundation of your shooting comes from the stance you assume when you are preparing to shoot a weapon. An unstable base will translate to poor accuracy and bad habits.
There are three types of stances you can choose from. The right type of stance for you will be determined by your natural firing position, comfort level and preference.
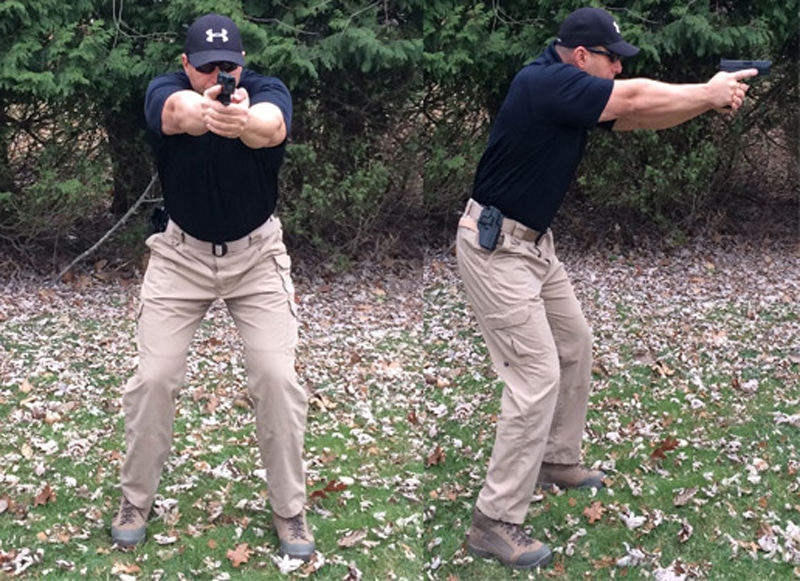
Isosceles Stance
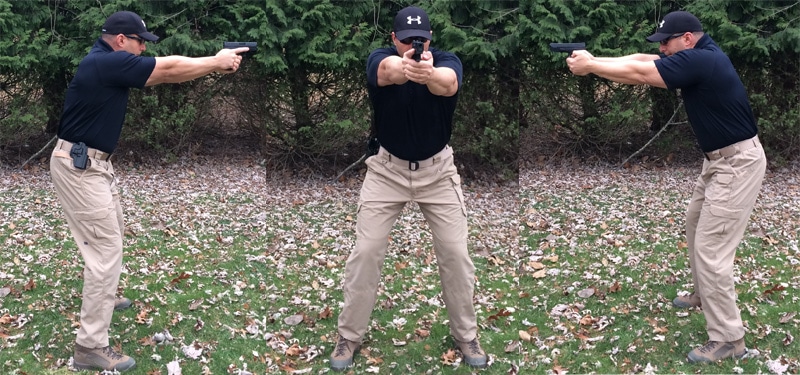
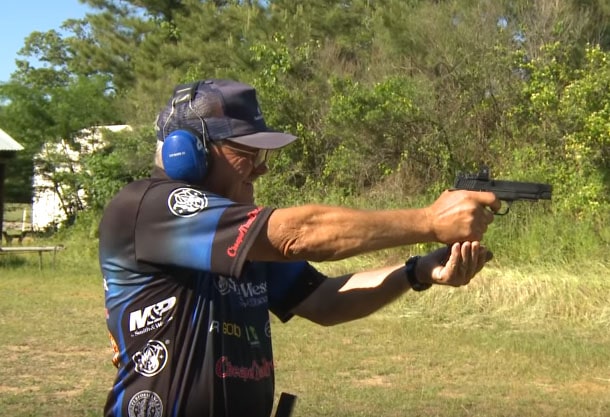
The isosceles stance involves positioning your feet shoulder width apart with toes pointed at the target and knees slightly flexed. The shooter leans forward from the waist towards the target to better manage recoil from the pistol. When your arms are extended they should form an isosceles triangle, which is where the name comes from.
Weaver Stance
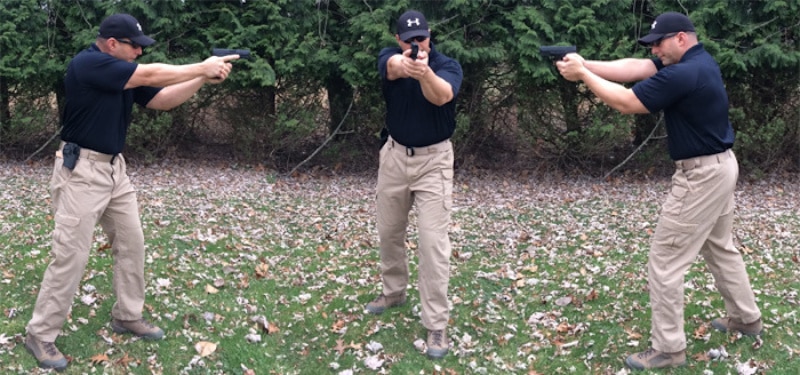
The Weaver stance uses uneven footing with the foot of your dominant side set back and the other foot pointed towards our target. The shooter’s dominant arm is extended and the other arm’s elbow is bent. This stance, or position, provides a stable push-pull grip providing a solid foundation to shoot from.
The trick is to slightly push the firing arm, or dominant arm, and pull with the support arm to help stabilize the shot.
Fighting, Modified Weaver or Chapman Stance
The Fighting, Modified Weaver or the Chapman stance, as the third stance is known as, is a blend of both the aforementioned types of stances. In this stance, the feet are spread shoulder width apart, with the dominant leg only slightly behind the forward extended non-dominant leg. The shooting arm is fully locked while the support arm is flexed slightly downwards.
With all the above stance options you want to lean slightly forward to compensate for the gun recoil. You also want to avoid leaning back on your heels.
All these shooting positions have some pros and cons and expert shooters recommend people try all three of these positions to see what fits them the best.
Common Posture Mistakes
A common mistake made by many shooters is to lean back or move their head and arms to line up with the handgun. This is this exact opposite of what you want to do.
The proper way to position yourself is to always bring the handgun into view while your legs, torso and head are already in a comfortable and natural position with a slight lean forward. You should NOT be cranking your neck and head back to aim the pistol.
Gun Grip
To have more control of your shots and manage recoil better you want to have as much contact area as possible with both hands gripping the gun.
Step 1
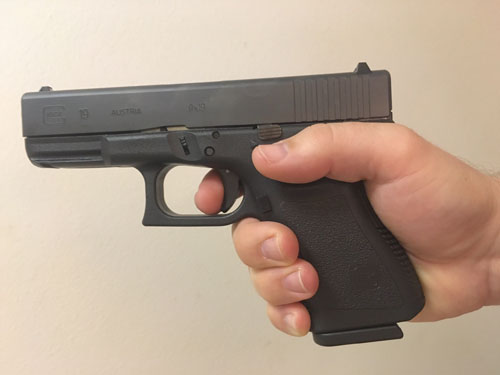
The first step to a proper grip is to hold your gun with your dominant hand keeping your index finger off the trigger.
The web of your dominant hand should grip high on the handle of the pistol and your trigger finger should be extended straight to the side of the weapon. The higher the grip is, the less muzzle rise you will experience.
Step 2
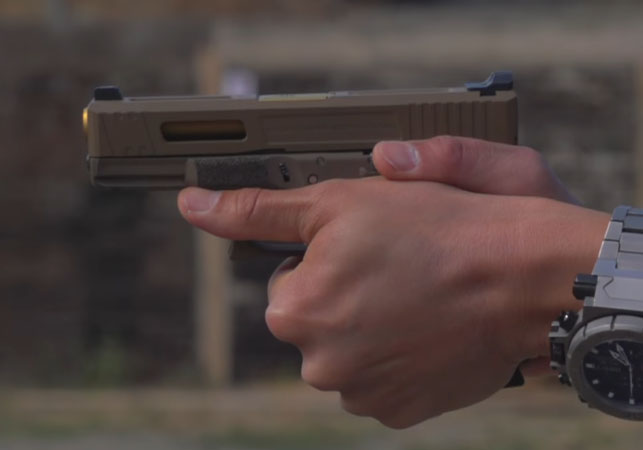
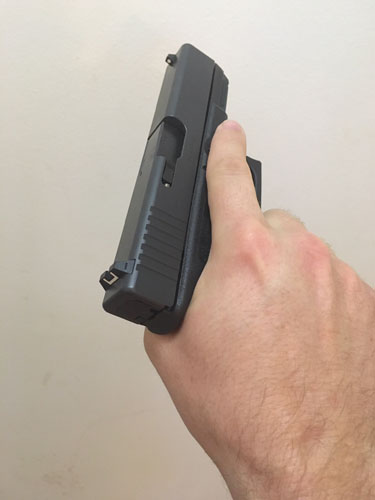
Next, you will notice on the other side of the gun there is an open area as shown in the picture below. Your other hand will cover the space left on the rest of the weapon to maximize your grip and control recoil.

You can keep a 45-degree angle between your non-dominant hand and the gun slide. Your non-dominant thumb will run along the pistol’s slide pointing at the target.

Your dominant hand’s web should also be aligned with your wrist so that it absorbs the recoil of the gun directly through the center line of your arm. The thumb placement of the dominant hand can be pointed towards the target as well.
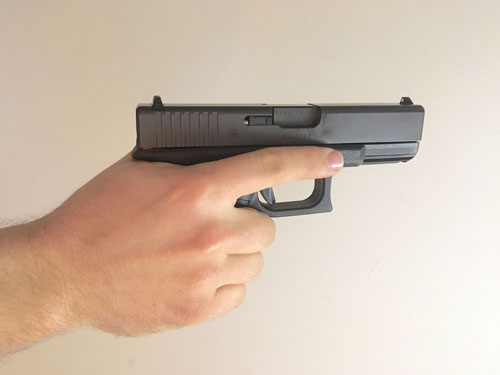
You do not want to “cup and saucer” the gun like shown below. Your non-dominant hand is doing little, if anything, to help manage recoil or control the weapon with this type of grip.
Your pistol should be gripped firmly but not so tight that your knuckles turn white and your arms start shaking with the stress. Having a firm grip on your weapon reduces the movement of the fingers that are not gripping the trigger
Remember that the more contact area you have with your pistol the more control and accuracy you will have.
Sight Picture

Pistols come equipped with a front sight tip (a small post that sticks up from the barrel of the gun) and a rear sight aperture. After raising your pistol, focus on the front sight tip that should be centered on the target. This is called getting the proper sight picture.
Your vision should be focused on the front sight rather than your rear sight or even your target. Yes, this may sound strange but your target and rear sights should look blurry compared to your front sight pin.
Sight Alignment
You will also need to have sight alignment along with sight picture. To achieve this raise your pistol and position the weapon so that the front sight tip is aligned perfectly in the center of the two posts that make up the rear sight aperture.
All the sight posts should also appear of even height and should not sit higher than the others. This means your weapon is straight and level and not angled and hence sight alignment is created.
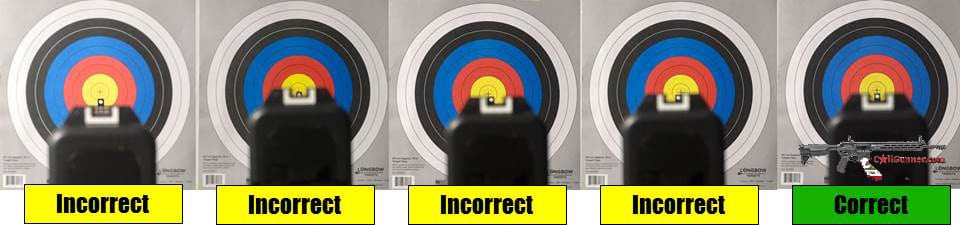
Again, this might be counter intuitive but your eyes should be focusing on the front sight rather than the target, meaning the target will look blurry compared to the gun sights.
It is best to keep both your eyes open and leveled at the target. This will reduce eye fatigue and give you more awareness of the situation
Your actual target will appear blurry behind the front sight tip centered between the rear sight apertures. This will give you the exact place where the gun will fire the bullet.
Breathing
It is common for shooters to hold their breath while shooting, but this is not the proper way to shoot. Breathe naturally; however, you will need to time your shooting in between your breaths if possible.
When you inhale, your lungs expand with air and when you exhale, your chest compresses. This movement can prevent you from keeping your weapon leveled at the target. Even if you don’t detect any difference, a minute shift in your weapon can make you completely miss your target. To solve this, squeeze the trigger when you breathe out and then don’t breathe in until the round has been fired.
Trigger Pull
This starts with proper placement of your trigger finger. Again, this is a personal preference and is determined by the length of your finger. However, most pro’s suggest placing the middle of your index finger’s first phalange on the trigger.
To pull the trigger, give a slow, controlled squeeze. If you jerk hard on the trigger, your gun hand will move and your shot will be very inaccurate.
Another thing to be careful about is not to quickly remove your finger from the trigger after each shot. When you lift your finger off the trigger too fast, you jerk the pistol. You need to hold the trigger down until the shot breaks and only release it after you hear the click of the trigger being reset.
Practice Shooting Pistols Accurately
The best ways you can practice your marksmanship is with dry firing. Dry firing allows you to practice pulling the trigger of an empty gun. This means you will not be distracted by the sound of your firarm.
Dry firing helps develop muscle memory so that you perform a smooth trigger press and don’t flinch when the time comes for real shooting.
See this article with more in depth instructions on dry firing.
There are also training tools like the MantisX Shooting Performance System available on Amazon that are extremely helpful to improve your accuracy without going to the shooting range.

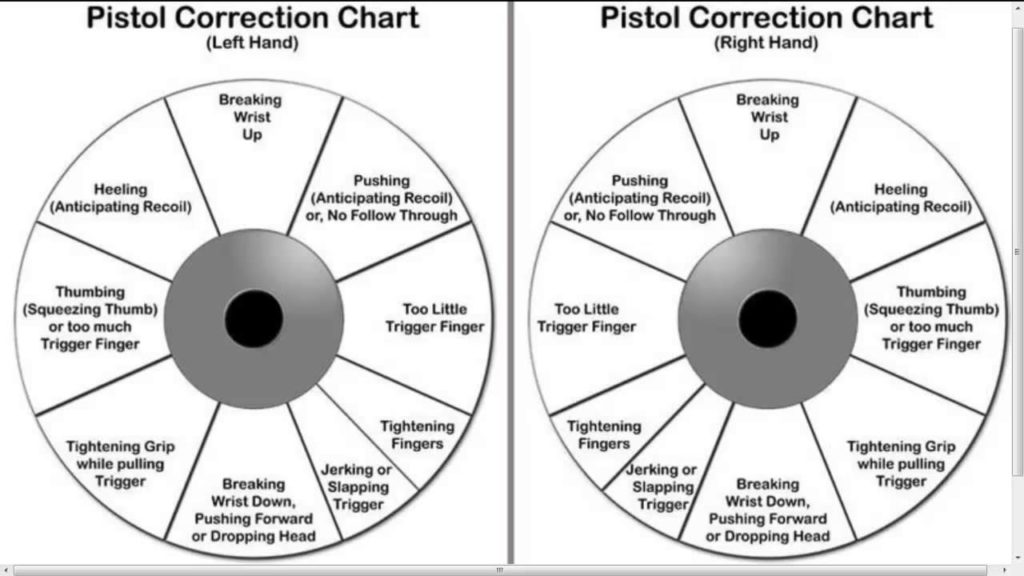
Pistol Correction Chart
A lot of the time a shooter may be missing the bullseye in a consistent spot on the target. Below is a pistol correction guide that can help you understand what you are doing incorrectly to miss your target.
The guide on the left is for left handed shooters while the image on the right is for right handed shooters.
Conclusion
Shooting a pistol requires hard work, dedication and a lot of patience. You won’t become an expert marksman in just a day. It can take years of practice and thousands of rounds of firing. However, using the above tips will definitely help you along the way.
Caligunner Copyright © 2018.
All Rights Reserved. Caligunner.com is a
participant in the Amazon Services LLC Associates Program, an affiliate
advertising program designed to provide a means for sites to earn
advertising fees by advertising and linking to amazon.com.