I can still remember the excitement of handling my first AR-15 and wanting to take it to the range immediately! I built my rifle from scratch and the last parts I ordered were the backup iron sights and Red Dot by Vortex. Shortly after installing them I began to wonder how far off the bullet would hit relative to where my sights lined up since it was a new rifle and had never been zeroed before.
This is a common scenario that plays out for most shooters, and in this article I will answer the questions of how to bore sight and zero an AR-15 and discuss what distance you should zero your rifle at.
What Does Zeroing Your AR-15 Mean?
Zeroing, which is also called sighting-in, is the process of adjusting your rifle’s sights or optics until its point-of-aim (POA) is the same as the bullets’ point-of-impact (POI) for a known shooting distance. In basic terms this means you go to the range and fire a group of shots and adjust your sights until the bullets hit the bullseye when your scope or red dot is centered on that point.
Keep in mind that the zero will be specific to the bullet weight you choose, in other words if you zero your rifle to 100 yards with a 55 grain bullet then decide to use a heavier bullet for hunting you will need to re-zero your rifle. As you get more serious about long range shooting it can be a little more complicated than that however that is the gist of it. To read how to zero your AR-15 see the section below.
What Is The Best Distance To Zero Your AR-15?
The simple answer is that you should zero your rifle for whatever distance you intend to shoot it at. However if you are new shooter this may not be a helpful answer, so lets try a different question. What do you want to do with your AR-15? Maybe you want to hunt, use it for home defense, shoot long range or possibly just shoot random targets in your backyard (also know as plinking).
A rifle can be zeroed for any range the shooter wishes, so you should choose what’s optimal for your intended use. The truth is that it is hard to have a one size fits all zero. With that said, probably the most common zero distance is at 100 yards since the trajectory is pretty flat which translates to a POI that only varies a couple inches over a couple hundred yards.
The chart below shows three different zeros from a rifle using a 16″ barrel with 55 grain M193 ammunition. You can see the blue line representing a 100 yard zero and where the bullet will impact at all the corresponding distances. With 55 grain ammo and a 100 yard zero in a 16″ carbine, your point of impact will be about 1.75 inches low at 25 yards, close to perfect between 100 and 125 yards and about an inch low out to roughly 175 yards. However if you know that ninety percent of the time you will be shooting targets no further than 50 yards it might make more sense to zero your rifle for the closer distance.

The 50 yard zero is also popular since you can see in the cart below that in addition to being zeroed at roughly 50 yards the bullet will also be zero at 200 yards. To pick the right zero for you it is import to think about how you intend to use the rifle and where most of your shooting will take place.
How Do I Bore Sight & Zero My AR-15?
The best way to zero your AR-15 is done in four steps, although the first is optional:
- Bore Sighting
- Shoot a Group at 25 yards
- Adjust Your Sights
- Zero At Your Desired Distance
1. Bore Sighting
Bore sighting is the act of using an empty barrel to provide an estimate of where your bullets will impact before you even shoot the gun. The basic principle for bore sighting an AR-15 involves removing the upper receiver and securing it on a steady rest or in a soft grip vise. With the bolt and carrier removed you then point to some distant reference object (like a paper target) that you can see while looking through the barrel.
With the rifle firmly in place and pointing at the known object, you then adjust your sights to line up with the reference object without moving it from its original position. This should be good enough to help your first shots taken to be on the target. This process is the same for any type of sight your using: backup iron sights, red dot or scope.
I would suggest using a large target that is roughly 25 yards away, much further and it will be difficult to do accurately. The goal here is just to “hit paper” on your first shots and then adjust your sights as necessary.
Another option is to use a laser bore sight which is pretty slick but not a necessity. It is a device that resembles a rifle round or can stick in the front end of the barrel that shines a laser beam aligned with your barrel showing exactly where you are pointing. Again this really is not needed but they can be found inexpensively online if you just like buying gun gear like I do.
2. Shoot a Group
Now that you have bore sighted (or just skipped right to this step) you will want to have your rifle assembled and ready to shoot. Probably the most important part of zeroing your AR-15 or any rifle for that matter is to use a good steady rest to make sure your shots are controlled and consistent.
This helps take out the variable of your shaky hands/body and will shorten the amount of time it takes to zero your AR-15 which also saves you some money. There are a lot of options out there but I like the Vanguard Porta Aim (approximately $45 on amazon).
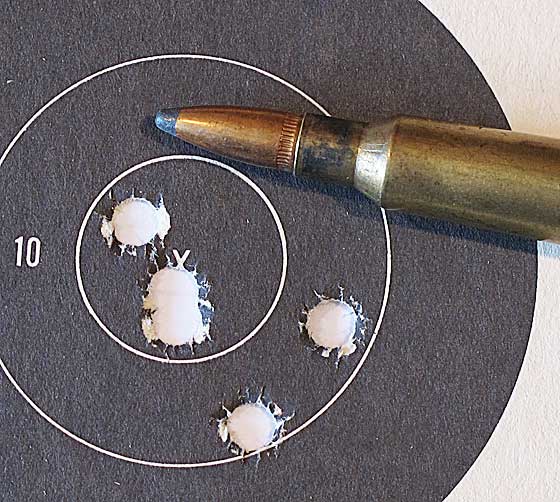
With your rifle positioned in the steady rest and your target at 25 yards, fire a three shot group. I suggest 25 yards to begin with to improve our chances of hitting paper since the closer range reduces the error that is propagated across the target. Your shots that are on the edge of your target at 25 yards most likely wont hit the target at 100 yards. At this point you want to check and see where the bullets hit the target. If you feel one of the shots was off due to human error throw it out and fire another round.
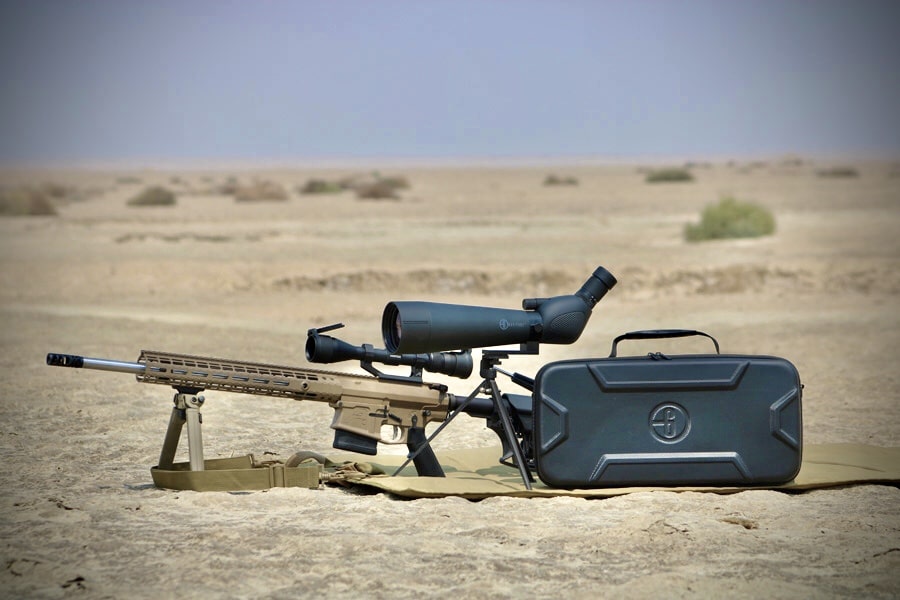
A very useful tool to have at this point is a spotting scope, this saves you from having to get up and walk to your target every time you shoot a group. At a public range this is a necessity since you have to wait until the range opens up to walk to your target. Some places will rent out spotting scopes which is great, but if you want your own I would suggest a Gravitude Raptor HD Spotting Scope on Amazon.
If none of your shots hit the target, you should repeat step one since something wasn’t done correctly and/or reduce the distance you are shooting to say 10-15 yards. The goal is to have three close shots somewhere on your target to serve as a starting point to make adjustments on your sighting apparatus.
3. Adjust Your Sights
If you are shooting with a red dot or scope you will typically have two turrets to make adjustments. The one on the top is the elevation turret which controls the vertical direction while the turret on the right side is called the windage adjustment that changes the horizontal direction.
Most scopes and red dots will make adjustments at 1/4 or 1/2 MOA with each click. The process for backup iron sights (BUIS) is a bit different since you change the front sight height for your elevation adjustment and the rear sight for windage adjustment. Reducing the height of your front sight (turning it clockwise) will raise the bullets POI while changing the rear sight to side to side will move the bullets POI in the direction you moved it (e.g. move the rear site further to the left, the bullet will impact further to the left).
Sidebar: What Is MOA?
A Minute of Angle (MOA) is an angular measurement of 1/60th of a degree and 1 MOA spreads 1.047” per 100 yards, but to keep it simple we just say 1″ since that extra .047″ won’t make a big difference for most shooters. This means your 1/4 MOA adjustment will translate to ~0.25″ on the target at 100 yards and 1/2 MOA will be .5″ at 100 yards. In contrast at 50 yards, 1/4 and 1/2 MOA will be .125″ and .25″ respectively.
A simple way to determine one MOA in inches is to take your shooting distance in yards and divide it by 100. For example, if your target is 200 yards away, one MOA at this distance will be 2″ on your target. With this information and the known adjustment of your turrets you can easily determine how many clicks needed to put your shots where you want them. Still a bit confused? Let’s go back to our first group of shots and figure this out with an example.
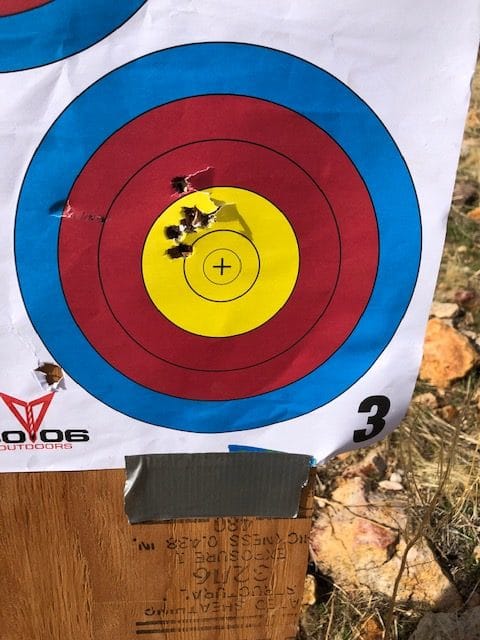
So back to our first group of shots. If you put three nice holes directly into the bullseye move to the last step, but if the group is somewhere else on the target you will need to make some adjustments. What you need to do is best guess the center of your three shots and measure the vertical and horizontal distances to the bullseye. Next you will move the bullets point of impact (POI) in the equal and opposite directions.
So lets say your group center is 4 inches high and 3 inches to the left, using your turrets you will move the POI by turning your elevation down 4 inches and to the right 3 inches. If your red dot or scope has 1/4 MOA adjustment, you will adjust the elevation down 16 clicks and 12 clicks to the right. Normally the turrets on your aiming device will have arrows indicating which direction will change the bullets point of impact. Not too difficult right?
Shoot another group of three rounds. Ideally all three should be close to the bullseye, if this is case move to the next step. If not, repeat the step you just completed.
4. Zero At Your Desired Distance
If you completed all the above steps at 25 yards and want to keep a 25 zero then you are done. However chances are you want to have your AR-15 zeroed at a different distance. No matter what range you decide to zero your rifle, move the target to that range, and repeat step 3. When your bullets strike exactly where you want them to at a given range, your rifle is zeroed. Now any shots your fire will not be a waste of ammo, but a calculated shot.
What If My Groups Are All Over The Place Or I’m Still Missing The Target?
Some of the most common problems that occur during a zero process is having all your shots spread out all over the target or having your shots completely missing in the first place. When the groups are large and do not provide some indication of a trend you will not know what adjustments to make on your sight. And if your not hitting the target at all, it’s even worse. Now what?
I would suggest a few things. First is to use the biggest target available that is still practical. If you have a target printed off you computer on a 8.5×11 inch piece of paper your margin of error is pretty small. You can also use your backdrop to help determine where your shots are going. Whenever I am shooting on public land (click here to see my guide to shooting on public land) I have a dirt backdrop that makes it easy to see where my shots are hitting. Lastly if all else fails get closer, even if you have to start at 5 yards and move further out.
Another problem area could be the mount to your rifle if you are using a scope or red dot. It doesn’t have to be an obviously loose mount, just enough to allow a slight shift that translates enough to throw everything off. So double check and re-torque the screws to make sure this isn’t the source of your problems.
Another source of your inconsistent shot might surprise you. You need to make sure your barrel or muzzle is not making contact with your shooting rest. The hand guard or stock is okay to make contact to your rest however the barrel is not! Even though your barrel is heavy and stout, resting the rifle on the barrel is a common error that will ruin your shots.
The reason this happens is that the barrel starts vibrating as soon as the round fires and even before the bullet clears the muzzle. Those vibrations bounce the barrel away from the hard surface it is resting against which typically causes your shots to hit higher, however they can be all over the place.
The last thing to check is if your overall fundamentals are causing the issue. Sometimes the thought of the recoil is enough for you to flinch or jerk while pulling the trigger causing a poor shot. Again I would reiterate the use of a good bench rest like I suggested earlier. If all else fails have an experienced shooter have a look at what you are doing or have them fire your rifle and go from there.
The more time you spend on the range shooting your rifles the easier it will be the next time around. Be sure to store and transport your rifles properly as a small drop or bump can mess up the zero on your optics.
Caligunner Copyright © 2018.
All Rights Reserved. Caligunner.com is a participant in the Amazon Services LLC Associates Program, an affiliate advertising program designed to provide a means for sites to earn advertising fees by advertising and linking to amazon.com.