
Reloading Basics for Dummies
Looking for the basics of reloading? Maybe you want to save money, make more accurate rounds or just reload because it is fun.
Whatever the reason, here is a general step-by-step example of what it looks like to reload your own ammunition using a single stage press to make the process more clear.
Step 1: Inspect Cases
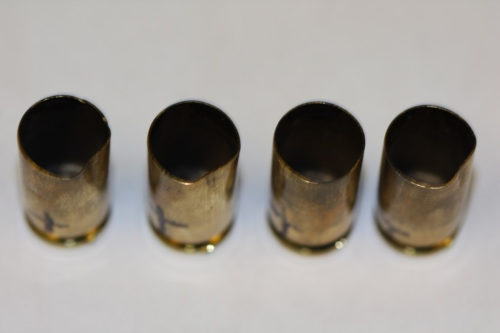
Collected brass with dented mouths, sizing step will correct these issues.
It does not matter if you have cleaned brass that you collected from the range or purchased brand new, you still want to inspect the casings and look for mouth splits, deep creases, brass chips or grit before shaping. In the event that the mouths are dented you can easily fix these during the sizing step.
Step 2: Lubricate Cases
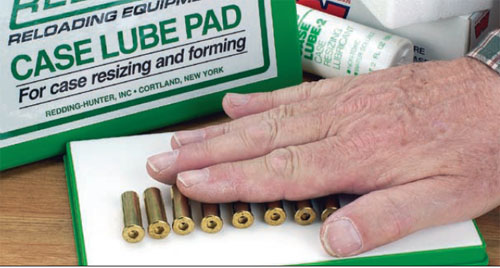
Use lube pad on pistol cases that are using steel dies. All rifle rounds need lube.
If you are using carbide dies this step can be eliminated, however, using standard steel dies will require you to lubricate your casings with a lube pad or spray like Hornady One Shot. I would recommend using carbide dies as they are cleaner and do not require all the cases to be cleaned afterwards.
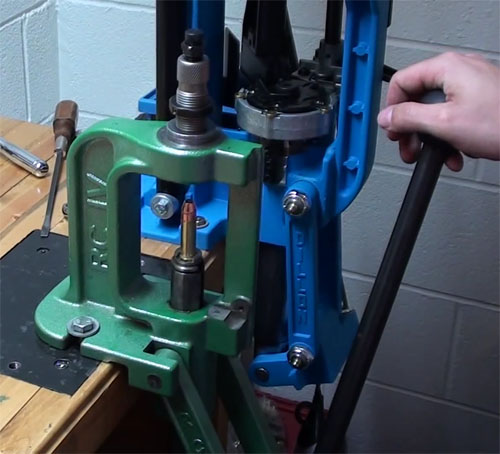
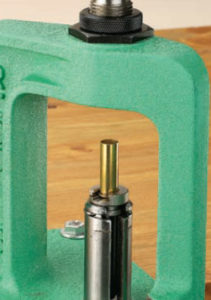
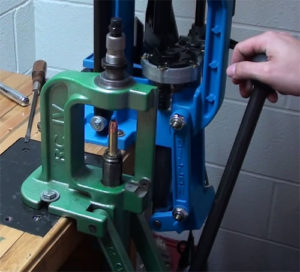
Step 3: Insert Sizing Die Into Press
Sizing die will correct improperly shaped and dented cases.
Die sets typically come packaged as 2-die sets for bottleneck cartridges and 3-die sets for straight wall cartridges. For the straight wall pistol round we’re reloading, the very first die the brass encounters is the sizing die.
Adjust the sizing die so that its base just touches the cartridge holder at the end of the lever stroke.
Step 4: Size and De-Prime Casing
Insert your casing into the case holder and pull the lever to run the case all the way into the sizing die to form the case to its correct dimensions. If the case you are using has a used primer installed now is the point where it will be removed.
Step 5: Check Casing Length
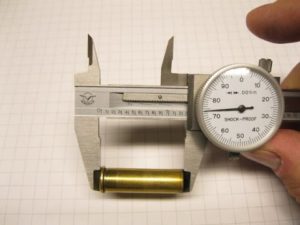
If you are using non-carbide dies you now want to clean the cases from lube and check the casing length. This can be done with calipers or a simple gauge. It’s likely the brass will stretch during resizing, especially if it full length sized.
Even if it doesn’t change length you’ll know that the brass dimensions are not going to change in any way after this point.
Step 6: Trim Cases as Required
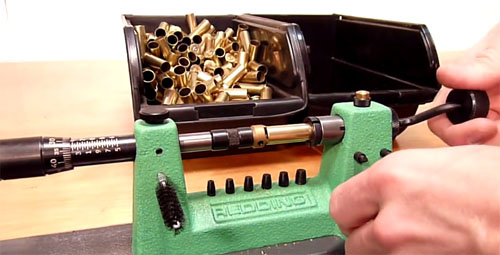
If any of the cases exceed the recommended length, trim them to the correct length to ensure proper chambering and uniform crimping around the bullet. Shown in the image above is the Redding case trimmer although I prefer the Hornady Cam Lock Case Trimmer.
Step 7: Use Deburring Tool As Required
After trimming, the case mouth might need to be deburred. Using the pointed end of the tool creates a slight chamfer at the inside of the case mouth while the other end cleans up the outside edge of the case. This will remove any burrs left on the case mouth after trimming and will allow a new bullet to be easily seated into the case

Step 8: Flare Case Mouth
If you are flaring the case so much that the bullets are “dropping into” the case, it’s too much.
Replace the sizing die with the neck expander and flare the case mouth. If you flair the case too much the bullet will seat too far in the case, while not enough flaring will make it difficult to insert the bullet at all. You only need enough bell for the case to accept a bullet and hold it long enough to enter the bullet seating die.
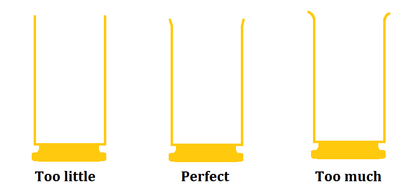
Less belling avoids premature work-harding and splitting of the case.
Step 9: Insert Primer
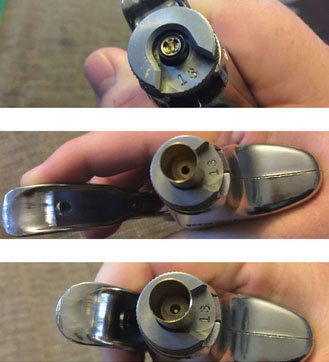
One example of primer installation using a hand tool although it can be done many ways.
This can be done several ways, above is shown using a hand primer tool. Hand priming can be done away from the bench and is generally faster than using the press.
Prior to inserting the primer, make sure the primer pocket is clean. Seat the primers carefully and make sure they reach the bottom of the pocket.
Step 10: Measure Powder & Charge Case
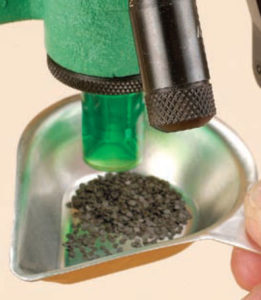
After consulting a loading guide (I recommend the Hornady Reloading Handbook) that defines the amount and type of powder to use, carefully measure out the powder to charge the cases ensuring you do not supply a double charge.
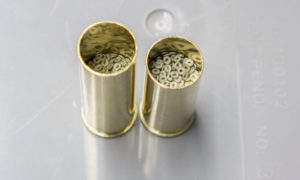
Notice the different amounts of powder in the two cases above!
After accurately weighing the powder charge, pour it into the case using a powder funnel. After you have finished filling the cases visually verify none of the cases appear to have a double charge. This is very important!
Step 11: Seat Bullet
After installing and adjusting the seating die per the die instructions, insert the bullet by hand into the mouth of the case. You want to make sure the bullet is sitting upright and concentric to the case it’s being pressed in to.
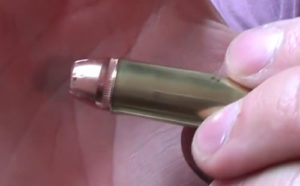
This bullet needs to be seated a bit further.
When first using the seating die you will need to tweak its position to have the correct bullet position in the case. If the bullet “falls” into the case you expanded the mouth too much in the earlier steps. If the bullet position is good, crank the lever and seat the bullet.
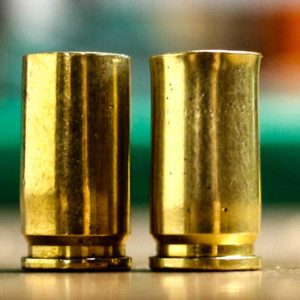
Step 12: Crimp
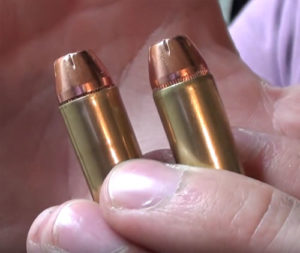
Before and after crimping.
Crimping can be done in the same step as seating, however, doing them in separate steps is recommended for beginners. All handgun cartridges require some sort of crimp to further secure the bullet to the casing, otherwise the bullet can get pressed further into the case when it hits the feed ramp in semi-automatic handguns.
In revolvers the bullet can move outboard of the case during recoil due to inertia if not crimped properly. This can then cause the bullet to bind in the cylinder while advancing the next round.
There are two types of crimps used for reloading handgun cartridges: the roll crimp and the taper crimp.
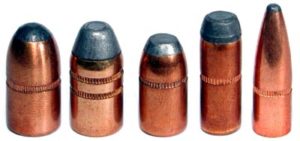
Bullets that have cannelures.
A roll crimp is used when the bullet has a groove or a cannelure and a tapered crimp is used when no groove or canneulre exists.
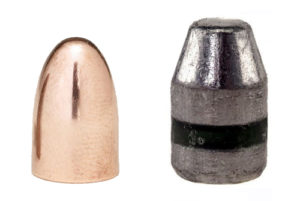
Bullets that will use a tapered crimp.
That’s it! You have just reloaded your own ammo!
Single Stage Press Versus Progressive Loader
The main difference between the two is that a progressive loader will make reloads 3-4 times faster than a single stage press. The steps above in this article show reloading using a single stage press, note that you have to remove and replace dies each step of the way which takes a little more time.
Progressive loaders have a rotating spindle that expedite the reloading process and allow you to make 300-400 rounds an hour versus 50 rounds an hour on a single stage loader.
Should I Start with a Single Stage Press or Progressive Loader?
Many people recommend starting on a single stage press since it is a lot less complicated than a progressive loader. You will learn the basics without the added complexity. However others suggest spending the extra money up front to get a progressive since it’s far more efficient in reloading ammunition.
If you are mechanically savvy you might consider starting with a progressive loader, if not the single stage is likely your best bet.
How Much Money Will I Save Reloading?
Obviously this depends on a lot of factors, but here are some ballpark numbers for common calibers and the cost per round you might expect to pay. Of course buying in bulk and finding good deals will lower the cost of what is listed here:
- 9mm approximately 13 cents/round
- .357 Magnum approximately 19 cents/round
- .44 Magnum approximately 28 cents/round
- .45 ACP approximately 17 cents/round
- .223 approximately 18 cents/round
- .308 Win approximately 41 cents/round
Recommended Setups
For a complete list of all the items you need to start reloading, check my article here on Everything you Need to Start Reloading.
Caligunner Copyright © 2018.
All Rights Reserved. Caligunner.com is a participant in the Amazon Services LLC Associates Program, an affiliate advertising program designed to provide a means for sites to earn advertising fees by advertising and linking to amazon.com.